Continuation Point Processor
The “Continuation Point Processor” is installed with the Dataristix Application. The processor accepts any input values and forwards the values unmodified.
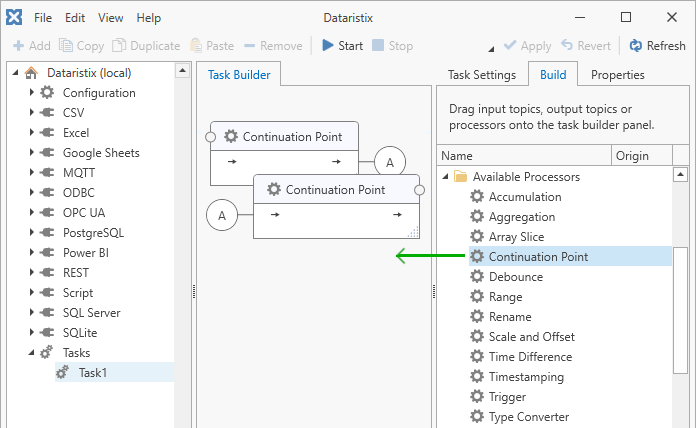
The processor has two separate parts, one end node and one start node. Both nodes have the same tags but can appear in different locations within the Task Builder panel. Connecting tags to the end node will add corresponding tags to the start node. Removing one node will also remove the other. Whatever was previously connected to feed into the end node will be reconnected directly to whatever tags the start node was forwarding its values to, so that data continues to flow as if the continuation point pair had never been there.
Continuation points serve two distinct purposes:
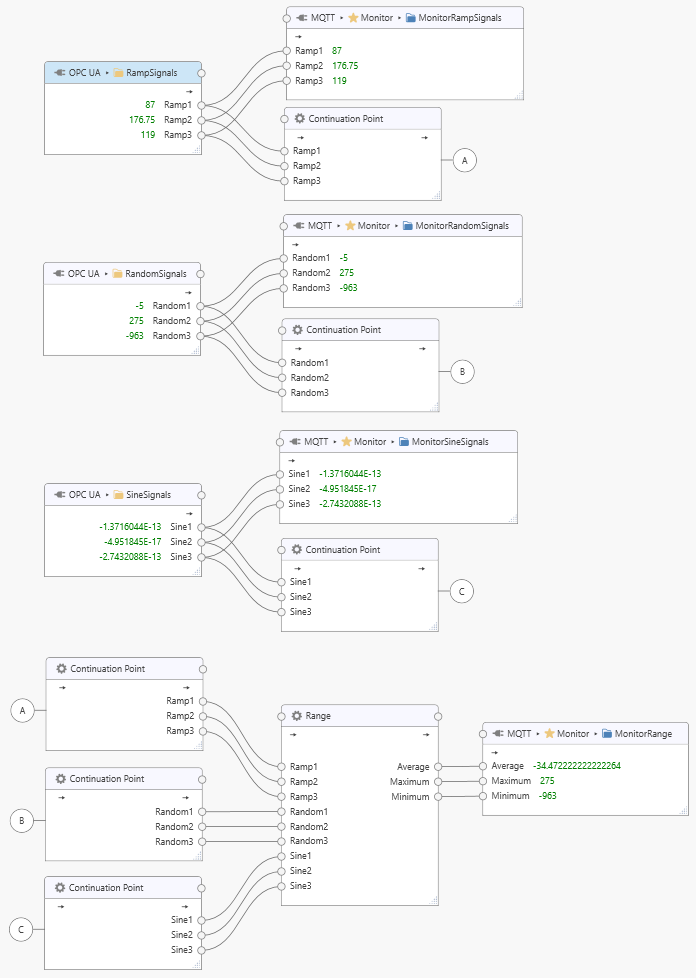
- Layout. Rather than letting a chain of task nodes extend across the Task Builder panel, or routing long connector wires past other nodes, insert a continuation point to end one horizontal line of nodes and continue the same data flow as a new horizontal line underneath. Start and end continuation point are automatically assigned a matching start and end “Marker Label” so they are easy to line up visually. Repeat as needed to keep even a long task pipeline organized as a series of short, easy-to-follow rows.
- Deterministic ordering. Use continuation points to ensure that parallel paths in a task pipeline are evaluated in a deterministic order before the values reach a downstream node. This matters whenever a downstream node’s behavior depends on values from multiple paths being consistent with each other, for example a trigger condition and the value it gates, when those values originated together but traveled through paths of different lengths to reach the same node. See Parallel paths for a worked example.
Add to Task
Add the “Continuation Point Processor” to a task by dragging it from the “Build” panel onto the task’s “Task Builder” panel.
Configuration
Select the “Continuation Point Processor” item in the “Task Builder” panel to view its properties.
You can change the following properties:
- Name
- The title of the “Continuation Point Processor” as it appears within the task builder.
- Marker Label
- A one-character label that appears as a marker within the Task Builder panel to identify matching end and start nodes.
Press the “Apply” button to commit your changes.
Example
The following example shows a task that receives various signals from an OPC UA datasource. All signal datasets are sent to the MQTT output connector and also to a “Range” processor to determine minimum, average, and maximum across all signals.
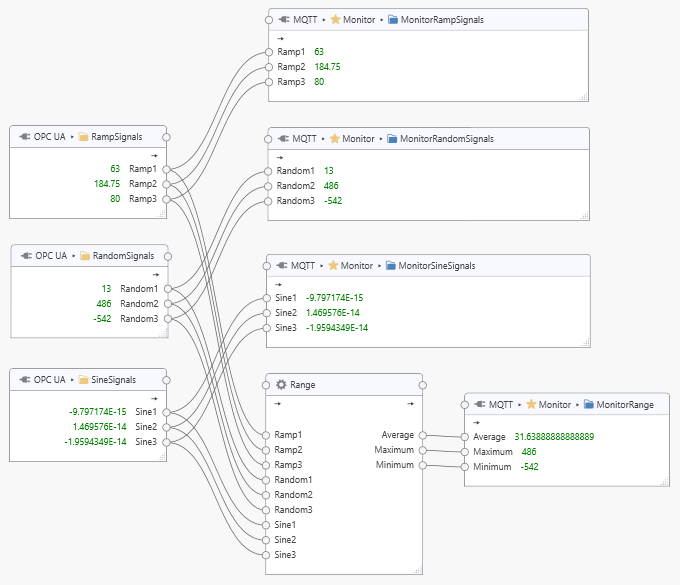
This is the equivalent task using continuation points: