Examples
Generic Publisher Topic
In this example, an MQTT client is configured with a generic publisher topic. The topic does not contain any tags and settings are as follows.
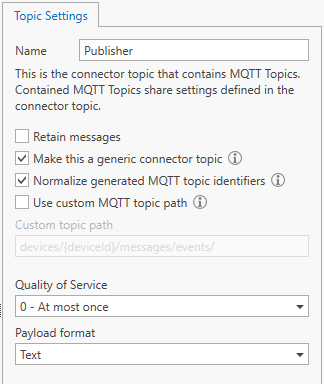
- The topic is named “Publisher” (any name will do).
- Option “Make this a generic connector topic” is ticked.
- Option “Normalize generated MQTT topic identifiers” is ticked.
The Quality of Service level is left at “At most once” and the payload format is set to “Text”.
Because this is a generic topic, any tag can be connected to the topic in Tasks. For example, the following task sends three sine signal tags to the MQTT connector (and, by inference, to the MQTT broker configured for the MQTT client).
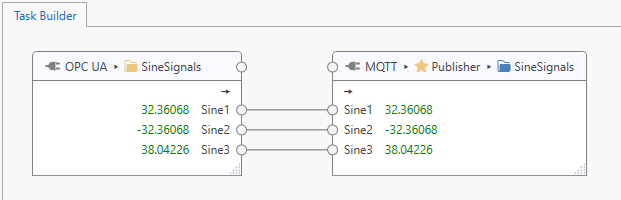
MQTT topic names for the sine signals are derived from the generic topic name (“Publisher”), the derived topic name (“SineSignals”) and the connected tag name (“Sine1”, “Sine2”, “Sine3”). The derived topic name is initially set to the input topic name that is connected to the “Publisher” when constructing the task but can be modified to suit. Because “Normalize generated MQTT topic identifiers” was checked, the MQTT topic is converted to lowercase characters.
The task shown above therefore publishes the following MQTT topics.
publisher/sinesignals/sine1
publisher/sinesignals/sine2
publisher/sinesignals/sine3
Non-generic Publisher Topic
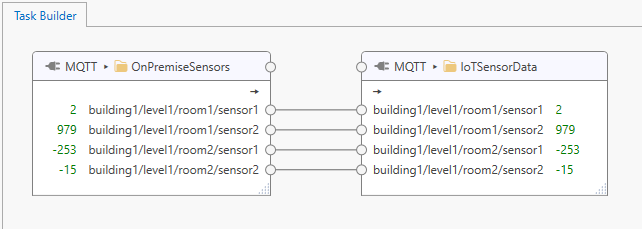
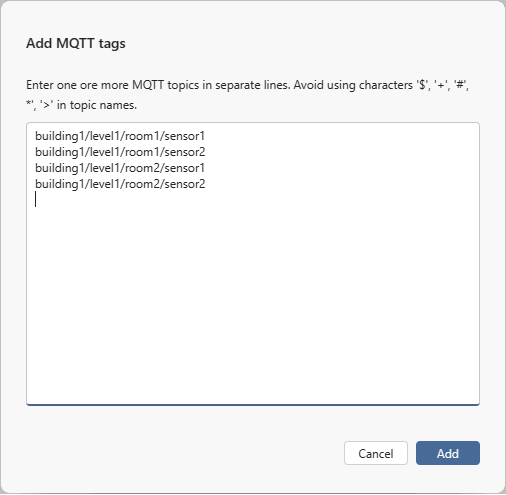
A publisher topic may also be “non-generic”, which means that all MQTT topics are predefined and added as tags to the topic. For example, a publisher topic may have the following tags (MQTT topics) added:
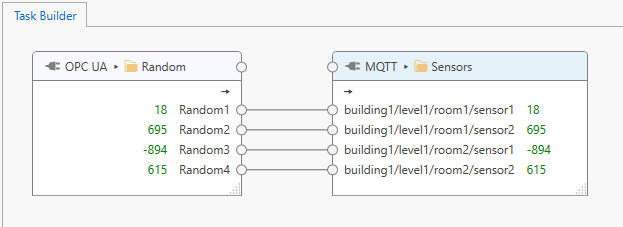
In tasks, these MQTT topics are represented as connection points. The following example shows the MQTT connector topic “Sensors” added to a task, with some random inputs connected to the MQTT topic connection points.
Subscriber Topic
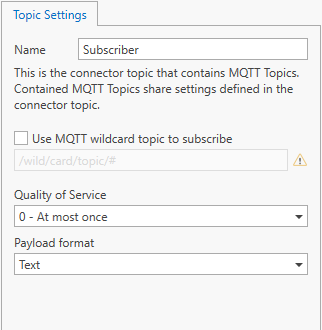
A subscriber topic may have the following settings.
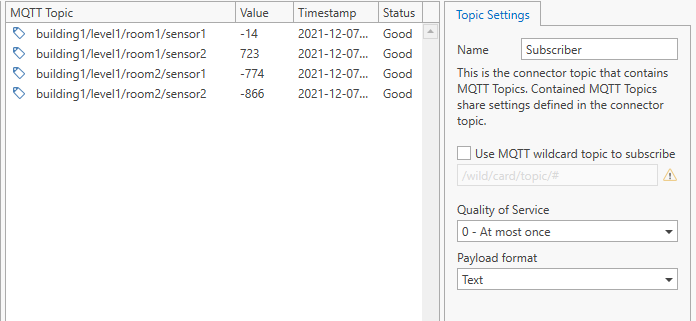
Now, the following MQTT topics are added to the subscriber topic (taken from the example above).
With the task in the previous example running (and publisher and subscriber connected to the same MQTT broker), we can see the live values being returned from the broker.
Automatically handle new devices
This example demonstrates how topics, tags and tasks can be configured to store individual sensor data points into a database. When new sensors are added to the network, then new data points are automatically processed without configuration change. Sensor devices are expected to identity themselves with a certificate.
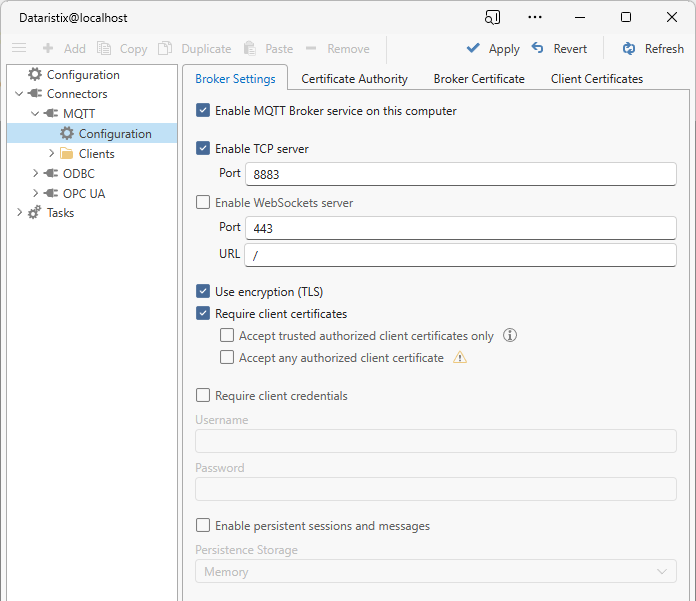
Configure MQTT broker
Configure the MQTT broker to use encryption (TLS) and to require client certificates. Review the TCP port settings and adjust for your network environment if necessary.
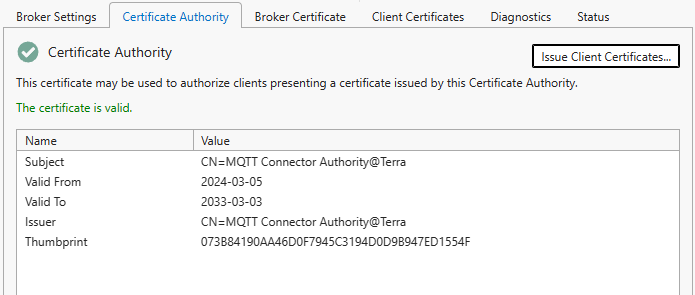
Use the same Certificate Authority
Ensure that the MQTT Connector Broker has the same Certificate Authority configured that has issued the device certificates. If the built-in Certificate Authority certificate is used or if a Certificate Authority certificate with private key has been imported, then the MQTT Connector may be used to issue new device certificates. Import a generated certificate into each new sensor device. Alternatively use your own tools to issue device certificates.
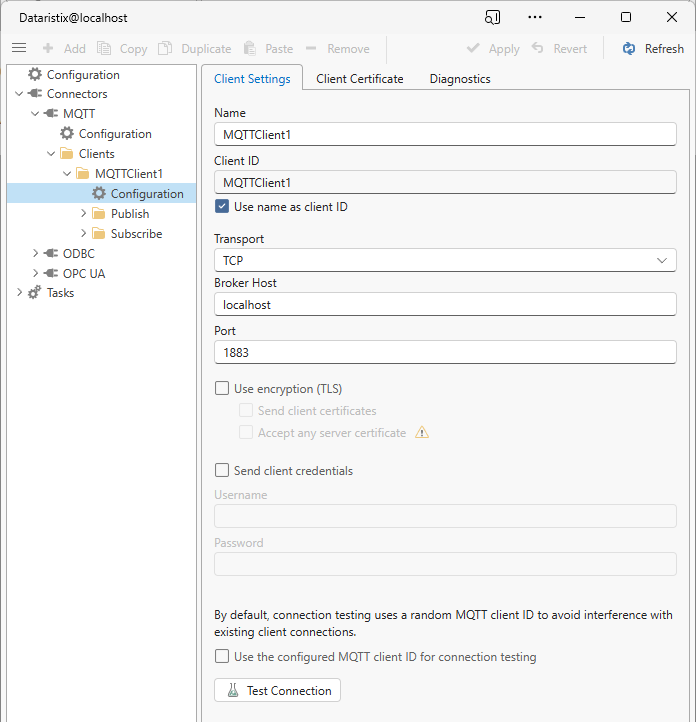
Add MQTT Client
Add an MQTT client to receive sensor data for further processing in Tasks. Ensure to tick options “Use encryption (TLS)” and “Send Client Certificate”. By default, new MQTT clients are created with a certificate issued by the configured certificate authority and you are ready to go. If you have imported your own Certificate Authority certificate without private key then you need to import a client certificate for the MQTT client that has been issued by your own certificate authority.
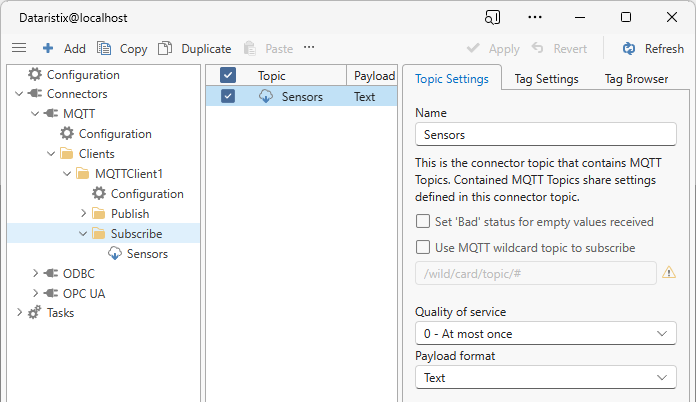
Add “Subscribe” Topic
Add a “Subscribe” topic to the MQTT client using default settings. This topic is configured to receive sensor data sent to the broker by the sensor devices. For this example, we have named the topic “Sensors”.
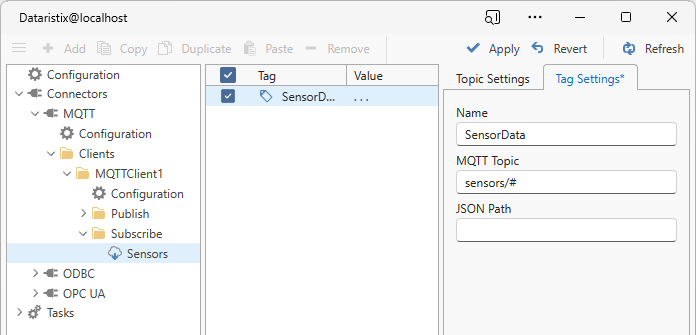
Add a tag
Select the “Sensors” topic and add a single tag using the “Add” toolbar button. We name the tag “SensorData” and use a wildcard MQTT topic setting for this tag to capture data for all sensors. We assume here that the all sensor devices publish their data to topics “sensors/sensor1”, “sensors/sensor2”, “sensors/sensor3”, and so forth. A wildcard topic “sensors/#” would therefore capture data for all sensors.
Add a task to process data
We can now add a task. Because the task receives data for multiple MQTT topics for the same tag, it is advisable to disable input value collation for this task in the task settings, so that each received MQTT topic is process separately, even in the unlikely event that an MQTT device sends data at exactly the same time as another one.
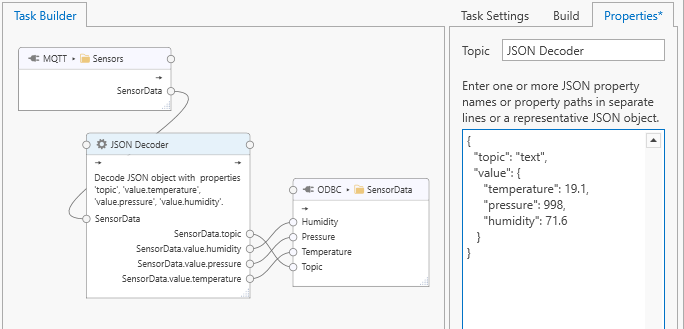
We assume that you are familar with task configuration and have configured an ODBC topic to store sensor data points into a database. Drag the “Sensors” topics that we have just created onto the Task Builder panel, then the ODBC topic and additionally a JSON decoder processor that we’ll use to parse incoming JSON messages before storing individual data points into the database. In this example, each sensor sends a JSON payload in the following form:
{ "temperature": 19.1, "pressure": 998, "humidity": 71.6 }
Because the MQTT connector will place this payload into a new object containing the MQTT topic name, the JSON decoder needs to decode the following JSON object instead:
{
    "topic": "sensors/sensor1",
    "value": { "temperature": 19.1, "pressure": 998, "humidity": 71.6 }
}
We therefore enter this representative JSON object into the JSON decoder. Now, we can connect the MQTT “SensorData” tag to the JSON decoder which makes individual data points available for connection to the ODBC connector.
Run task
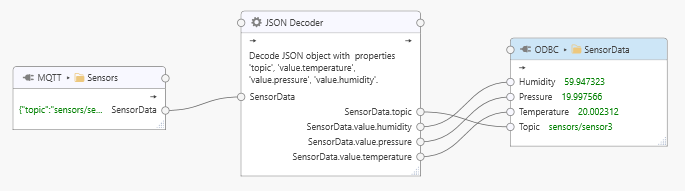
When the task is started and sensor devices send new measurements then each new measurement passes through the JSON decoder making the source of data (the “topic”) and the individual data points available for storage. With menu option “View/Live Values” checked, you should now see values from the various sensors passing through the pipeline.
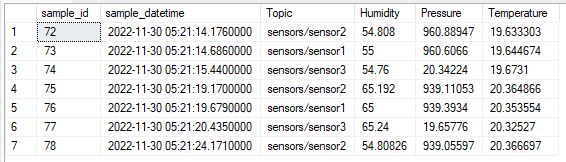
Finally, sensor data will be available in the database.
Note that you can use string manipulation processors to remove the topic prefix or use other processors to “normalize” topic names or otherwise pre-process data.
When new sensors are added to the network and start sending data, then the task can keep running without change and new data points are automatically logged into the database table.
MQTT Bridge
On-premises devices may send data to the MQTT connector’s broker. Using an MQTT client connected to the broker, this data then becomes available for further processing in Tasks defining a data flow to other connectors, including the MQTT connector itself. To forward the data to another broker (for example, an IoT hub), configure a task that bridges data between the MQTT connector’s broker holding on-premises device data and a broker in the Cloud.

Configure one MQTT client that subscribes to the relevant MQTT topics held by the local broker, then add a publishing MQTT client that connects to the Cloud broker. Finally, add a task that routes data from the subscribing client to the publishing client, therefore sending data from on-premises devices to the Cloud broker.