Tags
Add Tags
Tags are added to topics. Select a topic in the navigation panel of the main application and browse for tags in the “Tag Browser”. Select one or more tags and drag them onto the topic’s content panel or press the “Add Selected” button at the bottom of the tag browser panel. So select multiple tags using the mouse, keep the mouse button pressed while moving the mouse up and down the tag browser tag list.
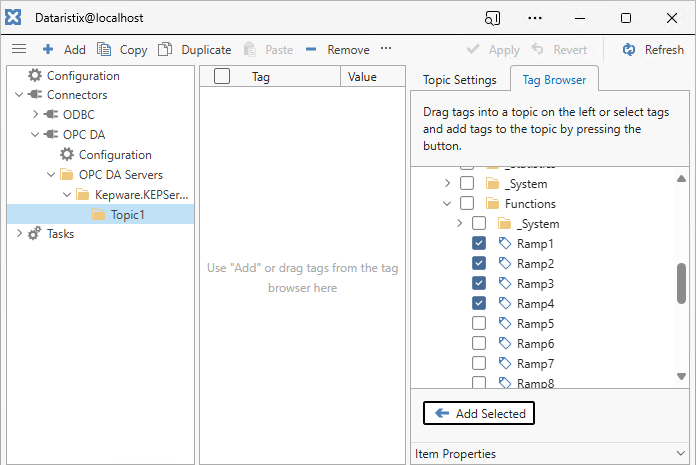
Click on a single tag and expand the “Item Properties” panel at the bottom of the tag browser panel to inspect a tag’s properties.
You can also add tags manually by selecting “Add” from the toolbar menu and by entering OPC DA tag identifiers in the form of OPC item IDs.

Press “OK” to add tags. Note that the “data type” field in tags lists remains bank when adding tags manually.
Tag Settings
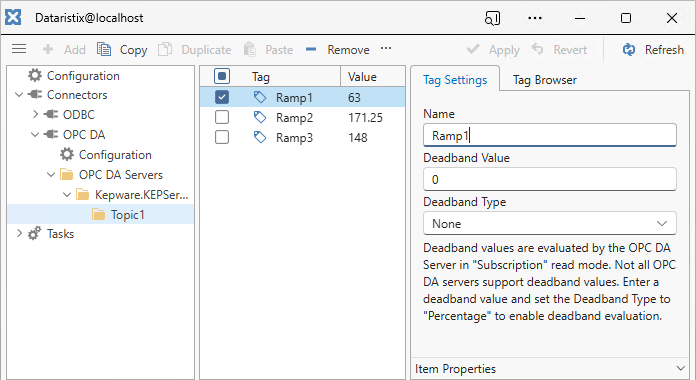
Click on a tag to edit its settings. View additional tag properties by expanding the “Item Properties” panel.
You can change the (display) name of the tag as required. Changing the name does not change the source of data but it changes the name as it is referred to in tasks. The original OPC Item IDs are listed in the tag list panel.
If the OPC Server supports it then you can configure deadband values for each tag. Deadband values come into effect for the “Subscription” read mode only. Change the Deadband Type to “Percentage” to enable the deadband value. The OPC Server will report data changes when the tag value exceeds the specified percentage value. Please refer to your OPC server documentation for more details on the OPC server’s capabilities.
Remove Tags
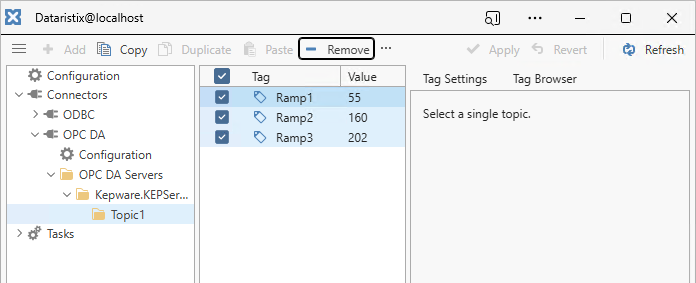
Remove tags by selecting a topic in the navigation panel, then select one or more tags to remove in the content panel, and finally click on the “Remove” toolbar button to remove selected tags.
Warning
Note that the tags are also removed from any task using the tags.